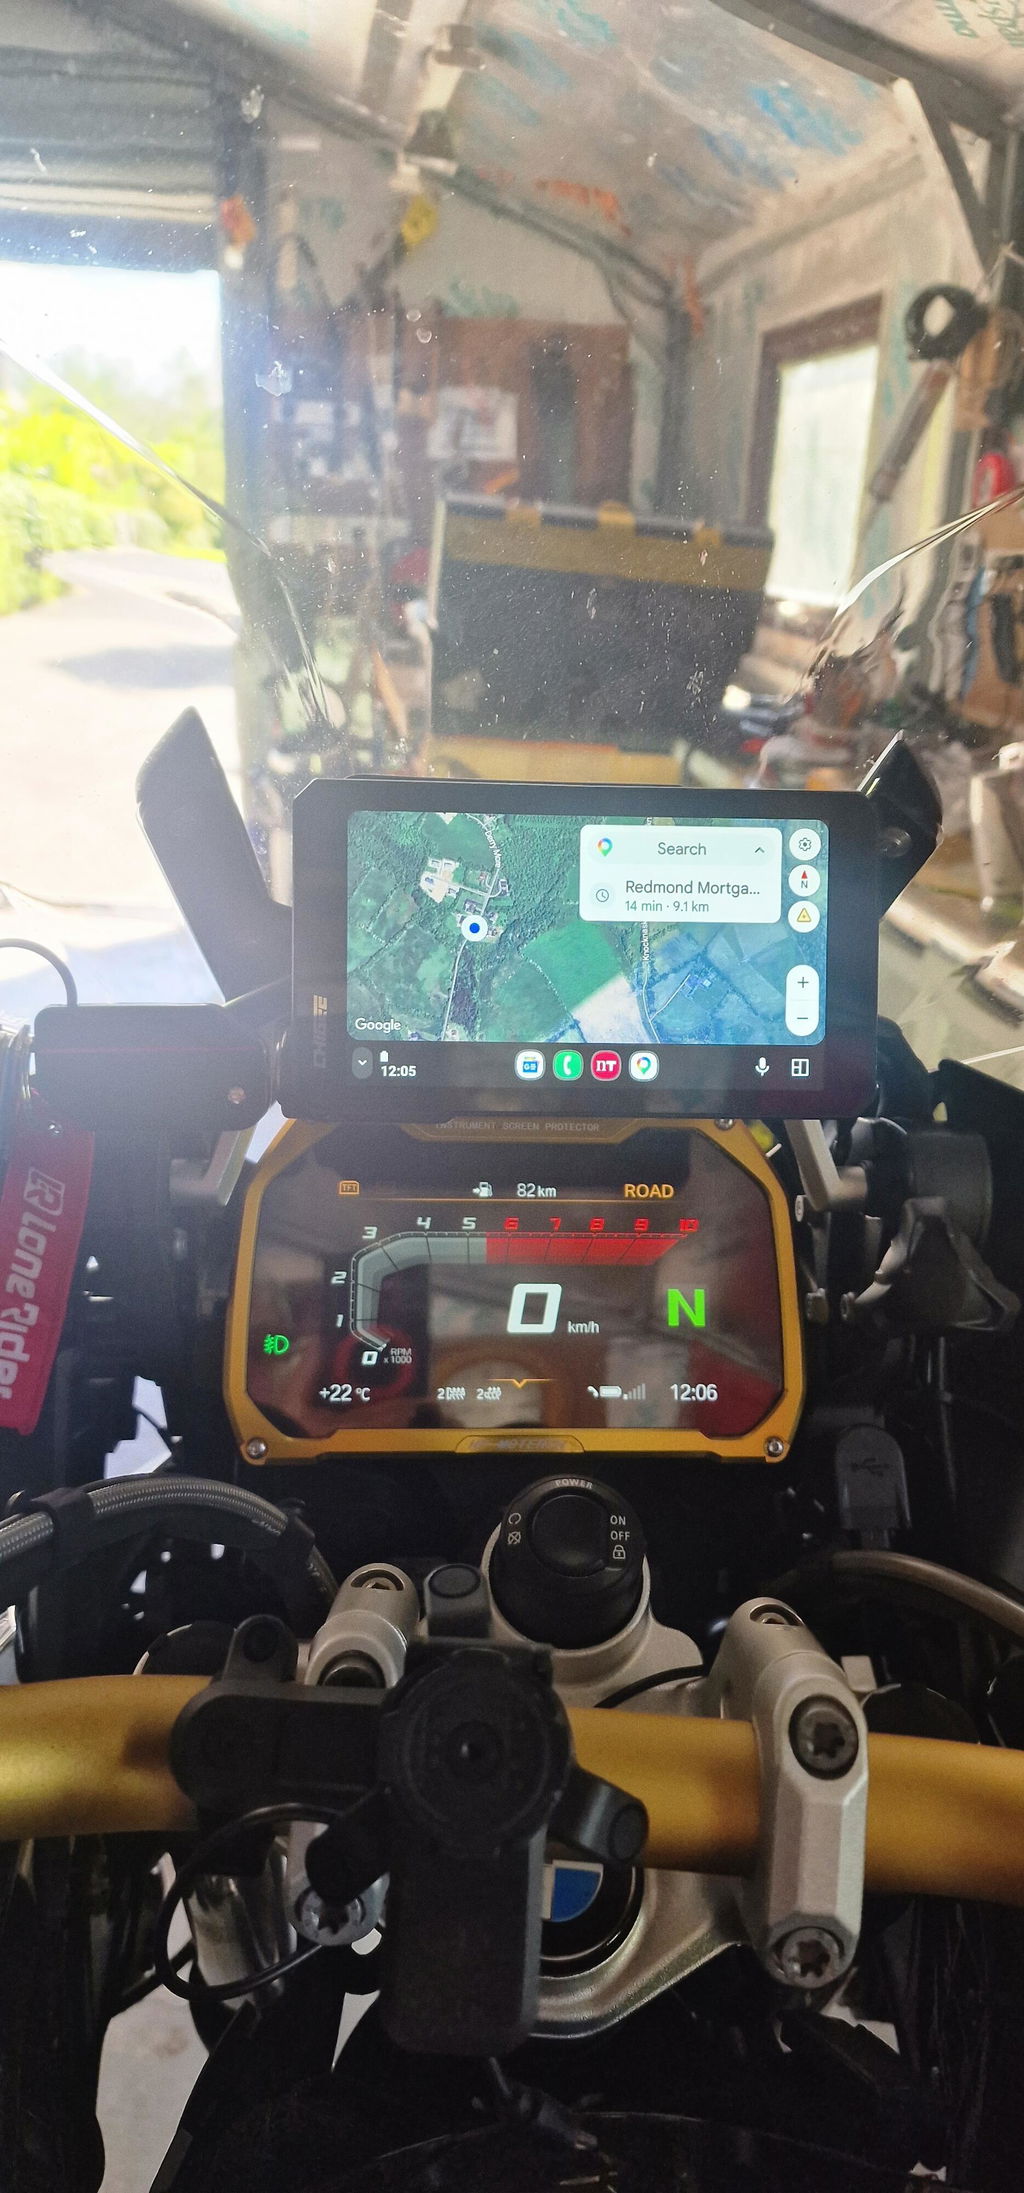
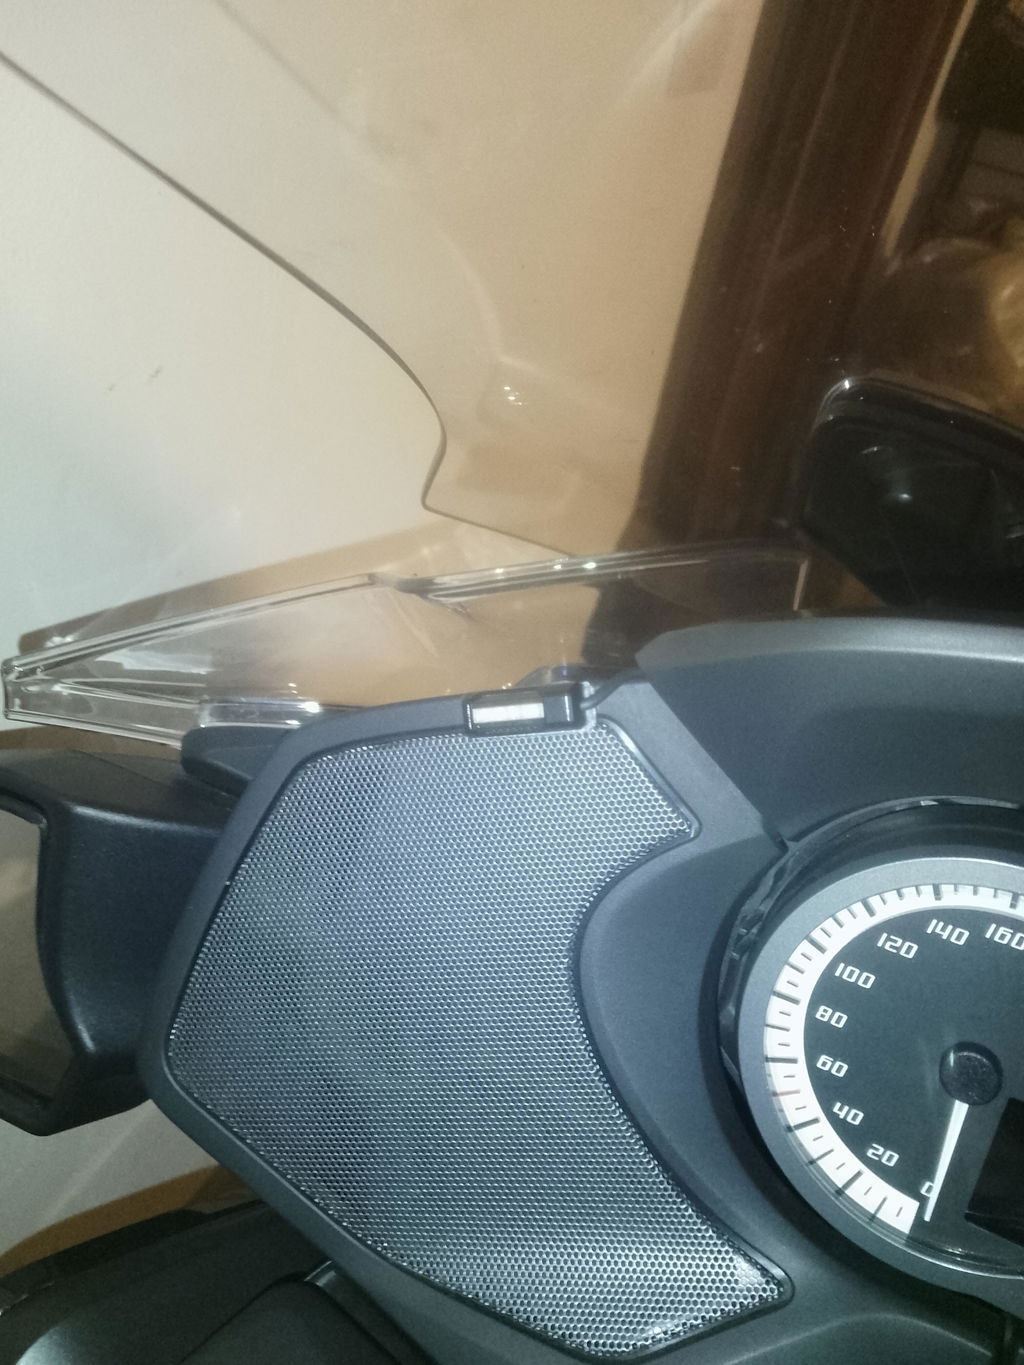
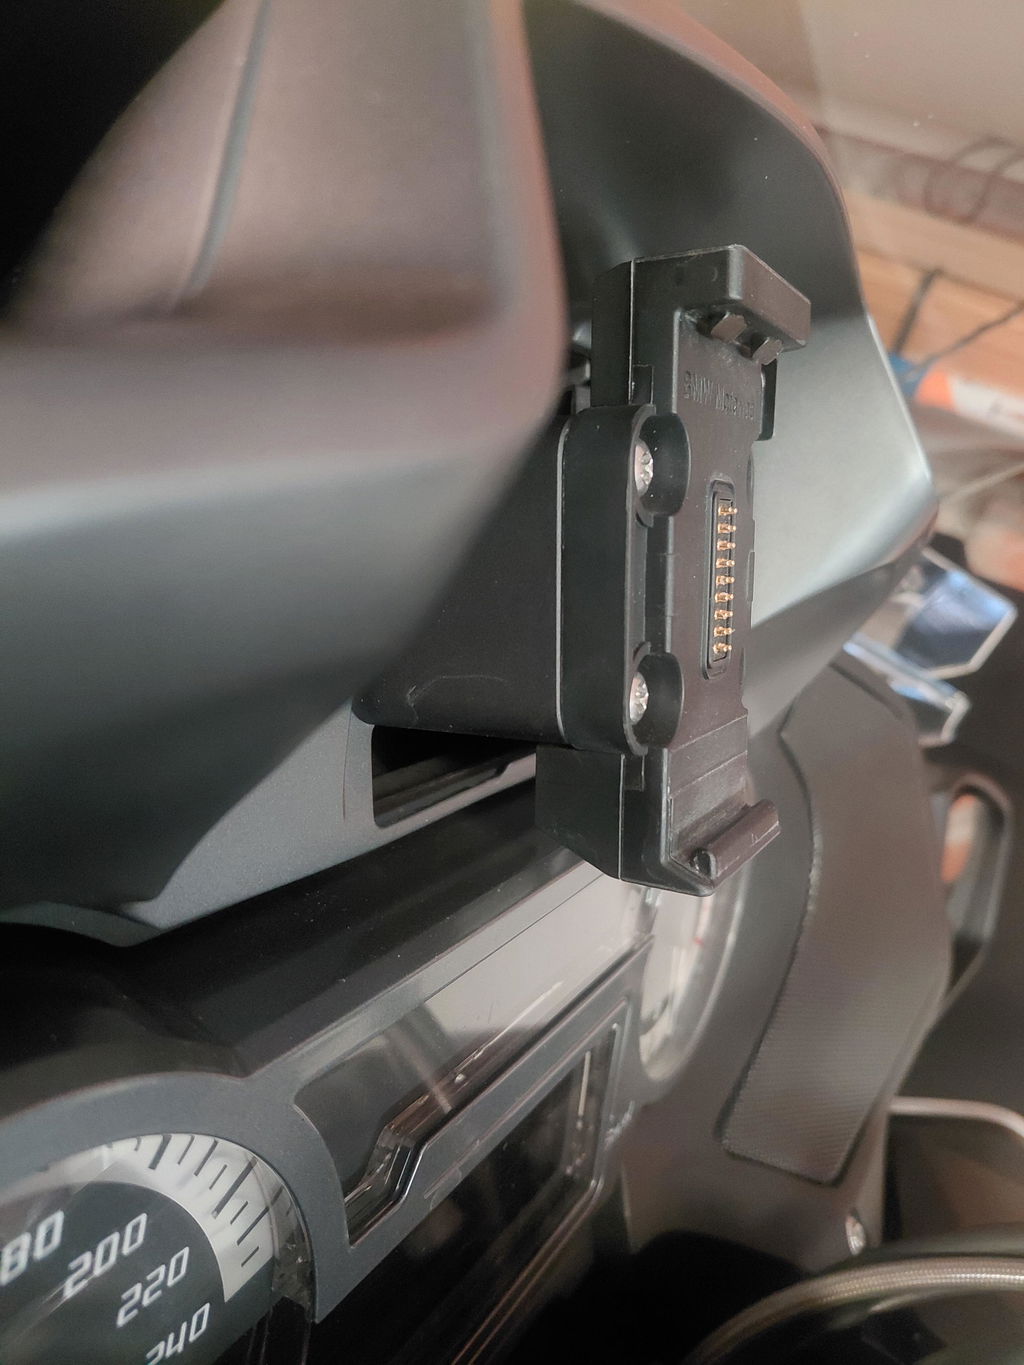
ยี่ห้อ: BMW
รุ่น: R1300 GS Adventure
เป็นอุปกรณ์เสริมที่ยอดเยี่ยมสำหรับ R1300 GSA ปี 2026 ของฉัน ซึ่งใช้งานง่ายและเชื่อมต่อกับระบบสื่อสาร Sena ของฉันได้อย่างราบรื่น หน้าจอคุณภาพสูงพร้อมเลนส์กันแสงสะท้อน (ควรติดตั้งเป็นค่าเริ่มต้น) ในราคาที่คุ้มค่าและหน้าจออาจจะใหญ่ขึ้นอีกนิด
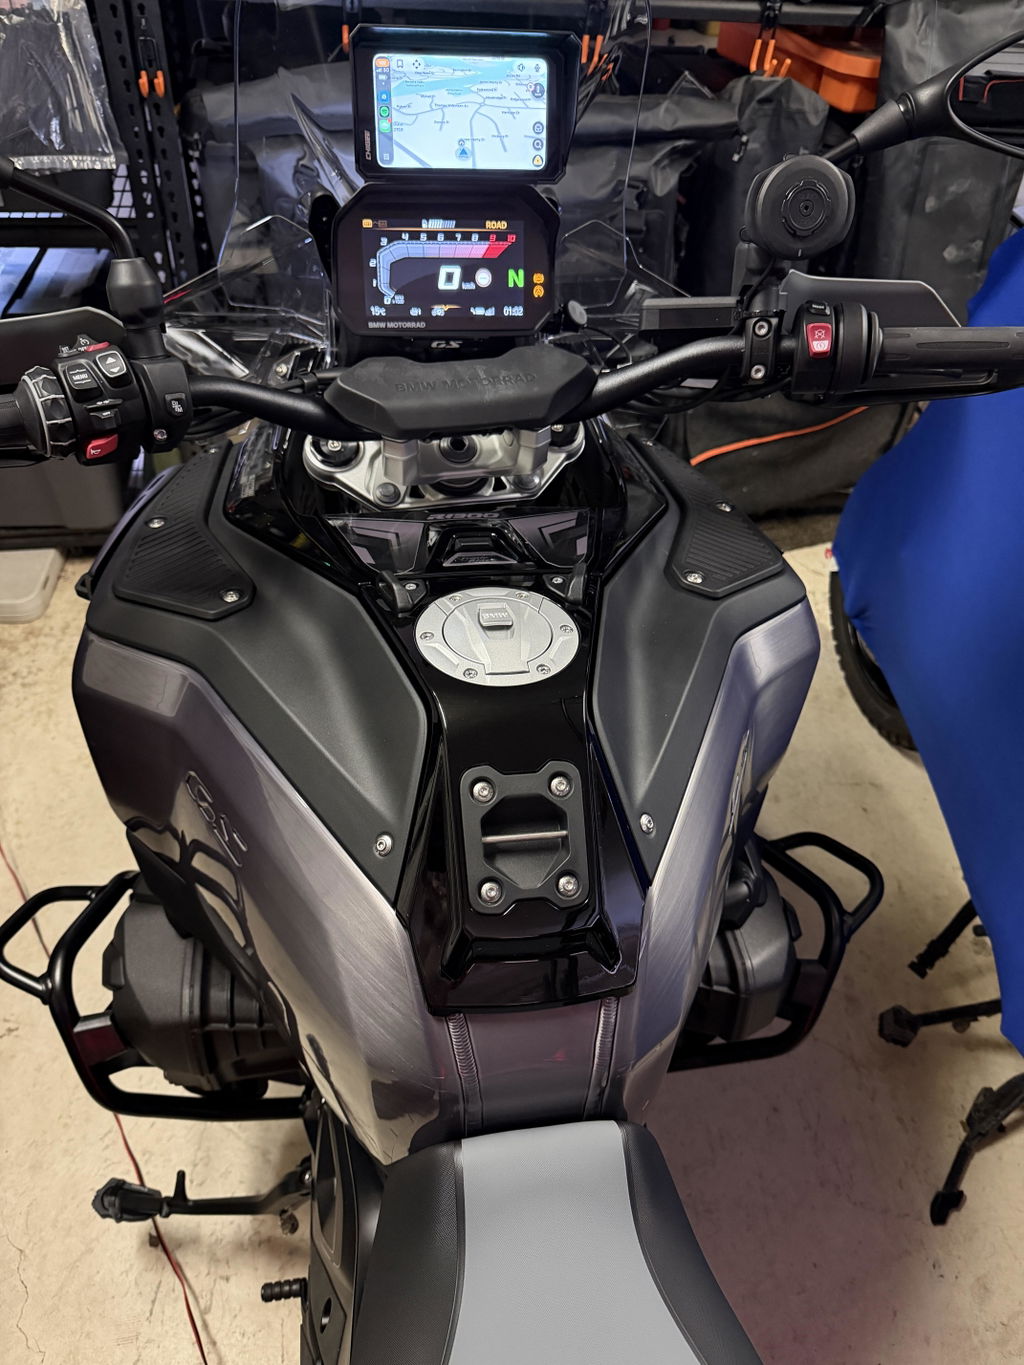
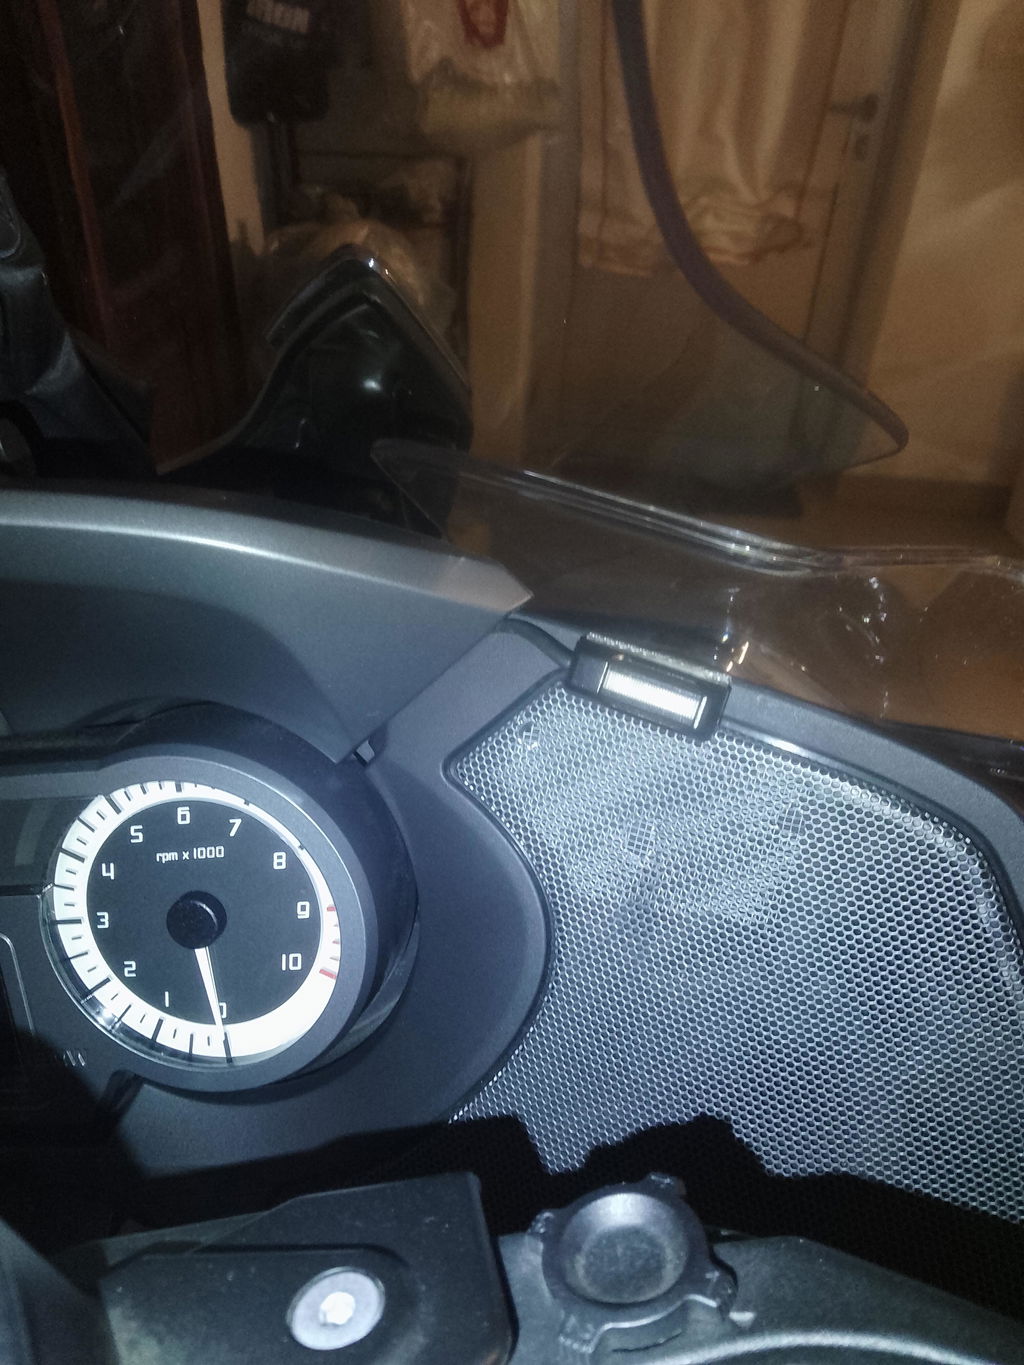
ยี่ห้อ: BMW
รุ่น: R1300 GSA
ตอนนี้ผมติดตั้ง AIO-6 บน R1300 GSA แล้ว ดูดีมากและเชื่อมต่อกับระบบ BMW ได้อย่างสมบูรณ์แบบ ชอบคุณภาพและบริการหลังการขายยอดเยี่ยมมาก รอคอยผลิตภัณฑ์ใหม่ในระบบนิเวศ Chigee และอาจลองกล้องตัวใหม่กับรถคันนี้!
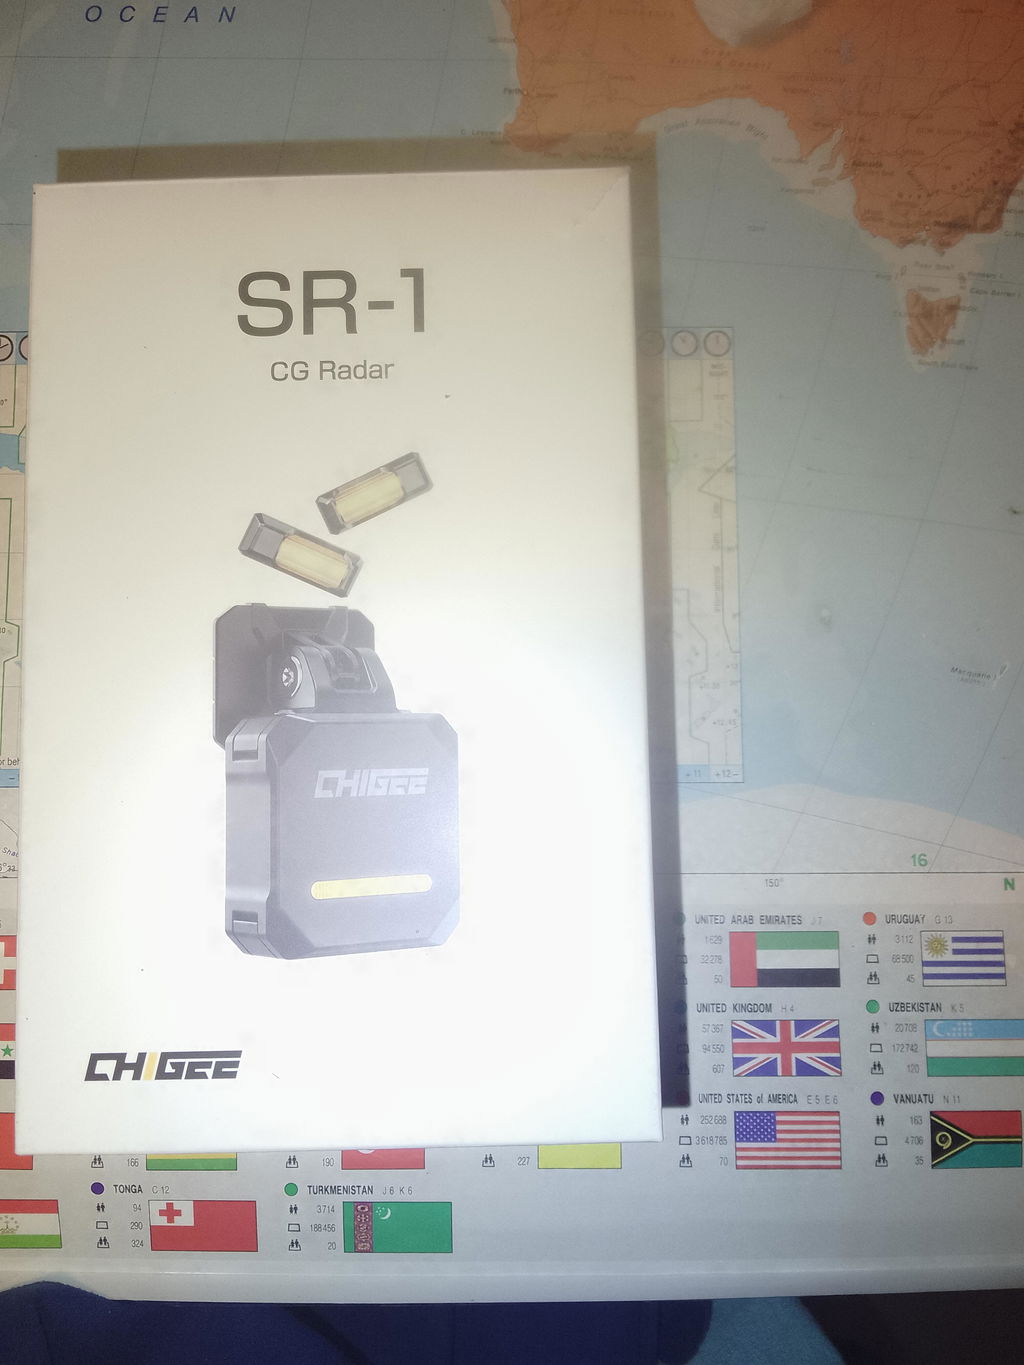
ยี่ห้อ: BMW
รุ่น: BMW RT 1250 2020
ต้องบอกว่านี่คือของเด็ดจริง! ผมรอรีวิวเพื่อทดลองใช้งานอย่างละเอียด และต้องยืนยันตามที่ระบบ Chigee อธิบายไว้ เรดาร์ที่ติดตั้งบน BMW RT 1250 2020 ทำงานได้ดีมาก เพราะกระจกมองข้างอยู่ค่อนข้างต่ำ ไฟ LED ที่ติดตั้งบนแผงหน้าช่วยให้มองเห็นได้ชัดเจน ระบบสามารถตรวจจับรถยนต์ได้ในระยะประมาณ 50/70 เมตร และเมื่อมีมอเตอร์ไซค์เร็วๆ แซงมา ระบบจะเตือนด้วยไฟกระพริบที่สังเกตเห็นได้ง่ายมาก ผมพอใจมากกับการซื้อครั้งนี้ ทั้งวัสดุและการจัดส่งยอดเยี่ยม และการติดตั้งก็ง่ายมาก แนะนำเลย!
ยี่ห้อ: BMW
รุ่น: R 1200 RT LC 2018
จัดส่งรวดเร็วและพอใจกับการสนับสนุนส่วนขยายมาก
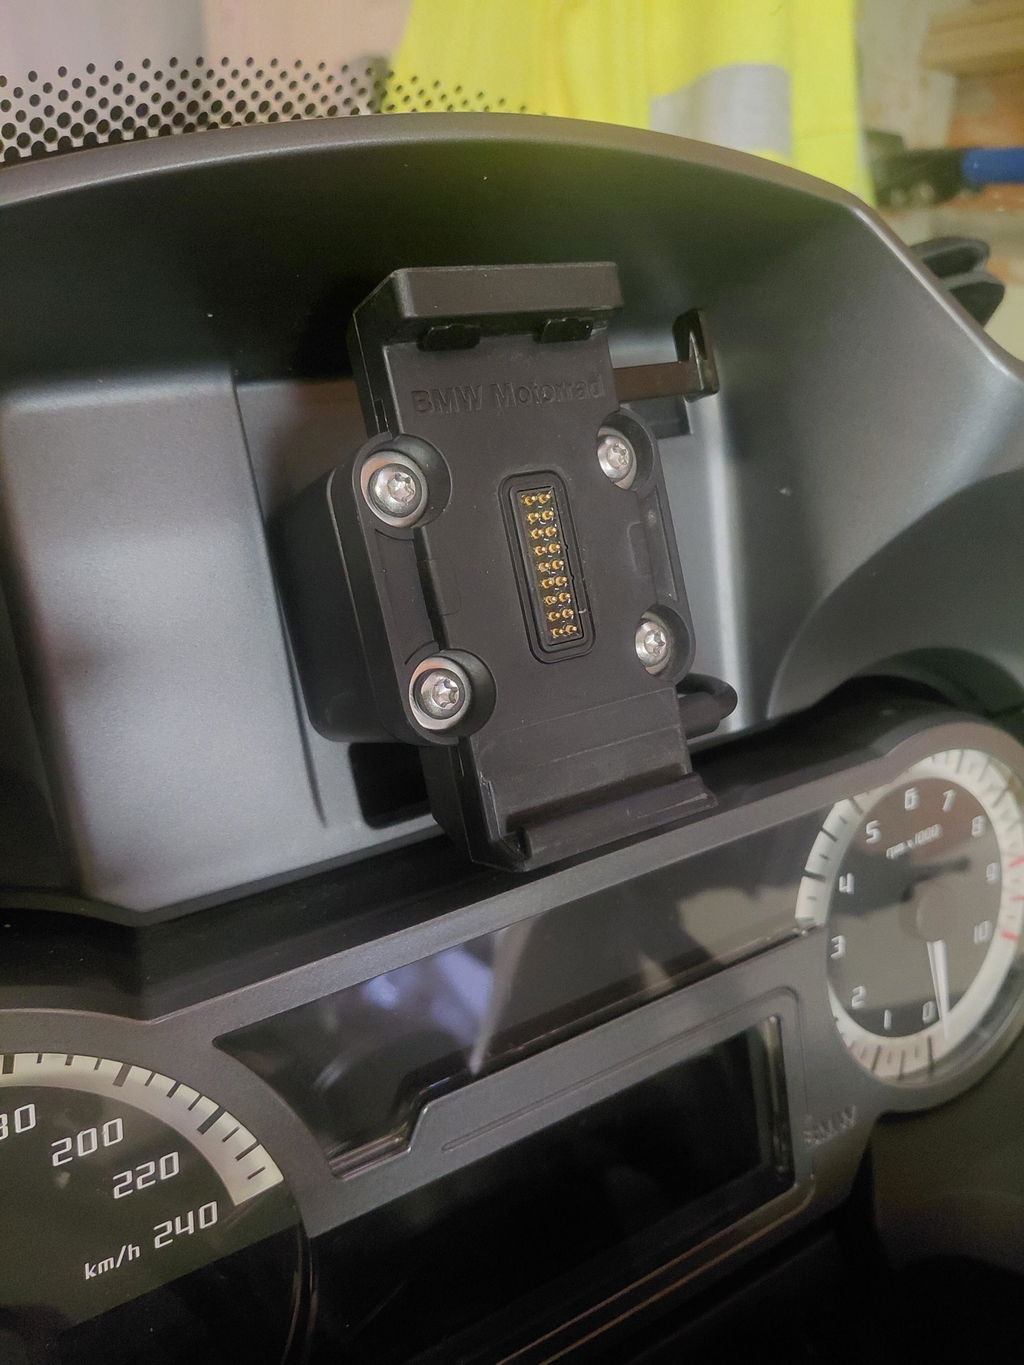
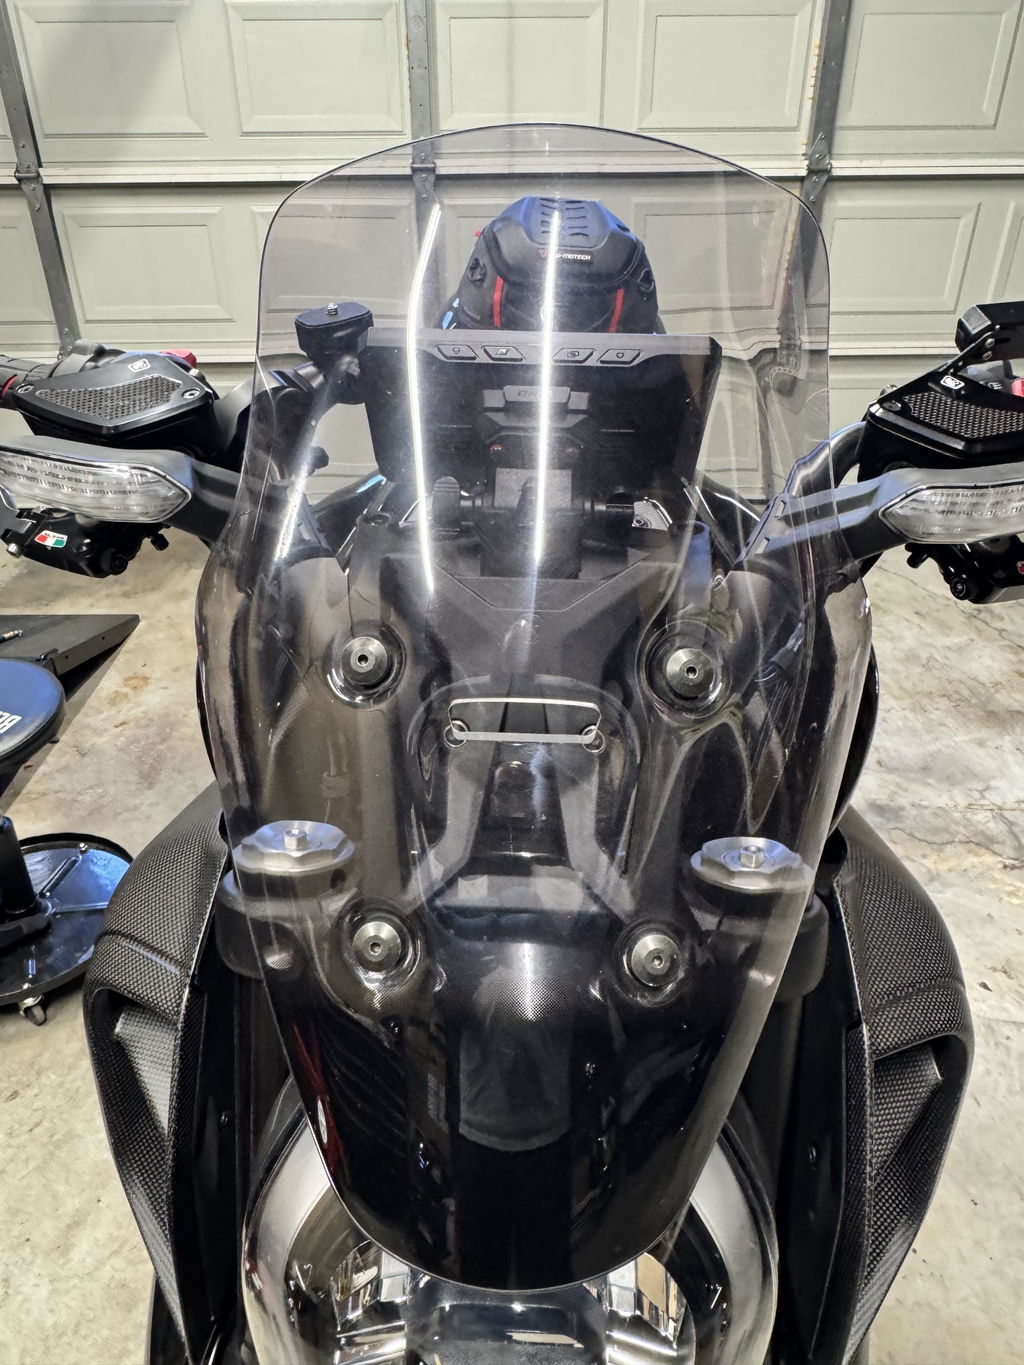
ยี่ห้อ: ดูคาติ
รุ่น: Diavel V4
โมดูล QR เป็นอุปกรณ์ที่ต้องมีเพื่อให้มั่นใจว่า CG AIO 6 ของคุณจะปลอดภัยเมื่อคุณไม่อยู่กับรถ เพียงกด ปลดล็อค แล้วนำติดตัวไป ไม่ต้องกังวลว่าจะยังอยู่บนรถเมื่อคุณกลับมา
ยี่ห้อ: BMW
รุ่น: R1250gs
โครงสร้างแข็งแรง คุณภาพดี เสียดายที่ไม่ได้แจ้งว่าไม่รองรับฐาน BMW GS